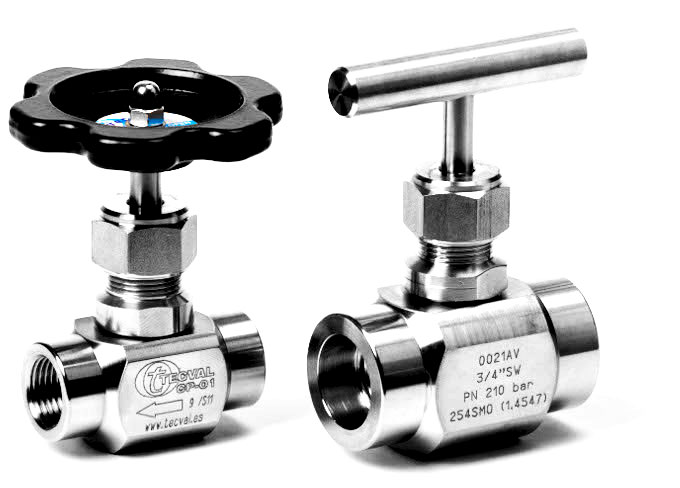

1.- USE
Needle Valves have a slender, tapered point at the end of the valve stem that is lowered through the seat to restrict or block flow. These needle valves are widely used to regulate accurately the flow of liquids and gases. The fine threading of the stem and the large seat area allow for precise resistance to the flow. Our needle valves can be operated up to 760 bar (11000 PSI) and up to 600ºC (1112ºF) with appropriate packing materials. See our Technical Data Sheets.
CAUTION: Needle Valves should be avoided in applications where the media is viscous. The small flow orifice can easily trap thick materials or solids and become blocked.
2.- INSTALLATION
2.1.- THREADED NEEDLE VALVE INSTALLATION
- Valves must be installed in the direction of flow as indicated by the arrow on the body.
- Pipe connections should be free of dirt and metal shavings.
- Several wraps of PTFE tape are recommended as pipe joint sealant.
- To achieve a leak proof joint, the pipe should be threaded into the end connection "hand tight", using a wrench to tighten the joint an additional 1/2 to 1-1/2 turns past hand tight. Tightening beyond this point may induce excessive stress that could cause failure.
2.2.- WELDING VALVE INSTALLATION
- Install valve in the open position.
- A proper preparation of tubing prior to installation is critical to achieve a proper joint. The tubing must be cut square, de-burred, and cleaned with a solvent.
- Ensure connecting pipes are correctly positioned and supported to avoid any strain on the valves.
- Do not ever exceed the 70 ampere of current intensity for welding.
- Apply heat directing the flame away from the body or center of the valve. It is essential to minimise heat transfer to the body (<200ºC) to prevent damage in the valve seats and seals.
2.3.- NEEDLE VALVE WITH ACTUATOR
- When adapting an electrical actuator, please follow the specific actuator’s manual.
- Make sure you are using the appropriate actuator according to the valve.
- Moderately tighten the joint’s screws if necessary.
3.- OPERATION
- Flow adjustment is achieved by rotation of the handwheel, clockwise to decrease flow and counterclockwise to increase flow.
- To close the valve use hand force only. Do not use spanners or bar extensions.
- When valves are used at elevated temperatures, precautions must be taken during operation to prevent burns on hands.
- Valves operated with actuators have mechanical indicators showing if the valve is "open" or "closed".
- It iss not recommended to leave the valve without operating for long periods of time. If posible, it should be opened at regular intervals to ensure proper and continuous operation.
4.- MAINTENANCE
- Wait until the system is depressurized and cold.
- When using dangerous fluids and before carrying out any maintenance operations, drain the system and test in the workbench before installing again.
- To adjust the packing, open the valve one full turn (one turn anticlockwise), tighten the nut (part 4) sufficiently to prevent leakage with the handle (part 3) being acceptably tight to turn.

- To adjust the packing, open the valve one full turn (one turn anticlockwise), tighten the nut (part 4) sufficiently to prevent leakage with the handle (part 3) being acceptably tight to turn.
- If the valve packing is Grafoil, wait for a couple of minutes after tightening the nut before checking the valve’s operation.
- Re-pressurise and check both leakage and operation.
- Back-seat needle valves allow a free packing change while the valves are in service and depressurized.
- RG-90 valve requires no maintenance.
- Depending on the criticality of service, spare parts and gasket kits are advised.
CAUTION: The bonnet (part 7) must not be removed from body (part 9). Do not disassemble the valve while under pressure.
